In today’s world, podcasts have become a very popular source of entertainment and learning for people of all ages. Listening to a podcast while driving has become a weekly or daily habit, and having a podcast playlist for kids is a must for parents or teachers.
To make a podcast at home use your smartphone or an audio interface with an XLR microphone to record voices. Use a computer to edit them, and add music and sound effects. Podcasts that tell fiction stories benefit from dramatic intonation. For podcasts that answer specific questions, make sure it’s properly stated at the beginning and fully answered during the episode.
In this post, I present how to make a podcast at home, from recording (the technical but easy stuff) to planning and structuring your episodes, based on my own experience creating podcasts for kids from preschool to college students for fun or academic purposes, and a few excellent websites that I’ve learned a lot from.
It’s easy to feel tempted to use apps that allow you to record, insert some music transitions and upload your work to Spotify, for example, and that’s perfectly fine if your objective is just to get people to know what you want to share.
But if you consider your work valuable to be monetized, read this post, and use a distributor specialized in making your podcasts available on multiple platforms. Read a lot more details in this post.
Let’s begin with the most common questions when you are recording a podcast for the first time:
- What Should I Talk About on My Podcast
- What Should I Use to Record a Podcast
- Recording Equipment
- What Are the Best Places to Record a Podcast
- Recording a Podcast with the Smartphone’s Built-In Mic
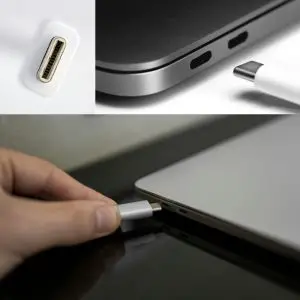
- Recording a Podcast with a Type – C USB Mic on your Smartphone
- How to Record a Podcast at Home
- What Elements Does a Podcast Have
- What Is the Basic Structure of a Podcast
What Should I Talk About on My Podcast
You should talk about something that is a passion for you, or something that you are very good at. If you are a college or university professor, you can create a good bunch of didact material for your lectures. If you are a parent, you can record stories for children of the same age as your own kids.
No matter how old you are and what your passion is, the key factor to making a podcast and enjoying creating every episode is to have a list of all the things that you want to share with your listeners.
- In case you are not very aware of what you are good at, think of the kind of things your friends or people who know you (work colleagues, relatives) ask you because they notice that you have an evident level of knowledge and credibility about it.
- Then, create a chart including the general topic and the things that you already know very well.
The following websites provide an excellent compilation of ideas to create a podcast:
- https://www.smartpassiveincome.com/blog/podcast-topics-ideas/
- https://www.bcast.fm/blog/podcast-topics
- https://riverside.fm/blog/podcast-ideas-to-try
What Should I Use to Record a Podcast
Recording Equipment
The easiest way to record a podcast is by using your smartphone. Every smartphone has a voice recorder app and the quality of the recordings is pretty decent. That means that you can record voices wherever you want and with digital quality.
The most simple way to record a podcast is by using your smartphone’s built-in microphone or attaching a Type C USB mic to it to reduce surrounding noises. Then, export that audio file and edit it in a DAW, to clean unwanted noises and add a soundtrack, transitions, and sound effects.

- If you choose the built-in mic option, the audio file will sound in stereo (all the voices and background sounds in 180 degrees left to right field, the way most TV series and movies sound).
- If you attach a Type C USB mic (lavalier or mounted on a stand), you will get a mono file. It will pick up your voice much louder than the background sounds. To avoid having occasional distortion peaks, place the mic 5 – 10 inches away from your mouth, but always on your chest.
- Warning: Using a standard XLR mic can work well when you connect it first to a sound mixer and from there to the small audio input in your computer (you will need a specific cable to do the job), But doing this is prompt to get a noisy recording, not because of the background but the electric power sockets leaking electrical noise.
Once you get used to recording with this basic equipment, you may feel tempted to invest in a more advanced set. If you want to follow this path, just use a computer and an audio interface to connect better quality microphones. That will place you at the level of a professional podcast.
See my recommended audio interfaces and digital recorders, headphones and studio monitors, and the best microphones for your podcast projects.
Some useful tips to consider in each case:
| Type of Equipment | Main Features | How to Get Good Quality Sound |
| Built-in mic on your smartphone (Apple iPhone IOS, Android Phones) | In most preinstalled voice recorder apps, the volume is already set. If you have a third-party audio recording app, like Cubasis, check the input level is not too high. With Cubasis you can record, edit, and add effects and music, all on your smartphone or tablet. | To avoid getting a distorted sound, place your smartphone 5 inches away from your mouth Place it a little further if necessary |
| Type C USB lavalier mic | Very practical for interviews, indoor or outdoor locations. | If you perceive that your voice sometimes sounds a little distorted, place the mic a little further and try to record again. |
| USB mic | You can connect it directly to your desktop or laptop’s USB port and get a really nice sound. | Most USB mics produce a little bit of noise floor, which may be a little bothersome. Use a noise removal plugin to reduce or disappear those unwanted sounds from your recording. |
| Digital Audio Interfaces | They are very easy to use and install. Just connect it to a USB port in your computer, and the operating system will recognize it as an external device. Use the drivers provided by the manufacturer to get the most accurate software, instead of the ones suggested by the operative system in your computer as soon as your interface is recognized. | If you use a dynamic mic, you may need a CloudLifter unit to boost the volume level. Condenser mics get the electric charge (what makes them sound amazing) from the interface (a button called 48V or Phantom Power). Use a condenser mic for each participant (host, guests). A basic interface allows two inputs, but some models can offer up to eight. Set the gain to the point you see a green light flicker. If the light becomes orange or red, it means that you have set the volume too high. Condenser mics tend to have a very low noise floor; it will reduce the editing time! |
| XLR condenser mics XLR dynamic mics | The best option is to get a cardioid condenser mic. It will provide excellent quality. Although dynamic mics (like the famous Shure SM57 and SM 58) sound great, they also allow some level of noise floor (you will need a high gain to get a satisfactory sound). | If you’re using a dynamic mic, use an audio lifter attached to the mic to boost the volume and make your mic sound like a high-quality condenser mic. |
Type of Equipment, Main Features, and How to Get Good Quality Sound for your Podcast – Audioproductcreators.com
What Are the Best Places to Record a Podcast
The best places to record a podcast are rooms with absorbing materials on the walls, as well as thick rugs on the floor. The thicker the material on the wall, the less reverb your microphone will pick up. If you count with a little budget, consider purchasing some sound-absorbing foam panels or making your own portable sound booth. It’s totally worth it.

I like to use a portable sound booth made of cardboard and absorbing acoustic foam. It reduces a lot of the noise and reverb from the place where you record your podcast, and it’s very cheap and easy to make. You can fold it and place it in a suitcase.
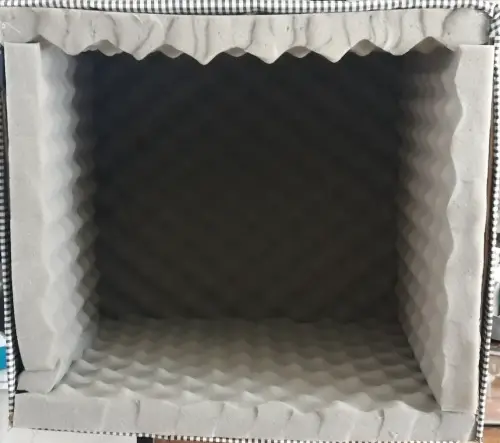
And that is precisely what many well-established audiobook and voice actors take with them wherever they go. A portable booth, a good quality USB mic, and a laptop or tablet are all they need!
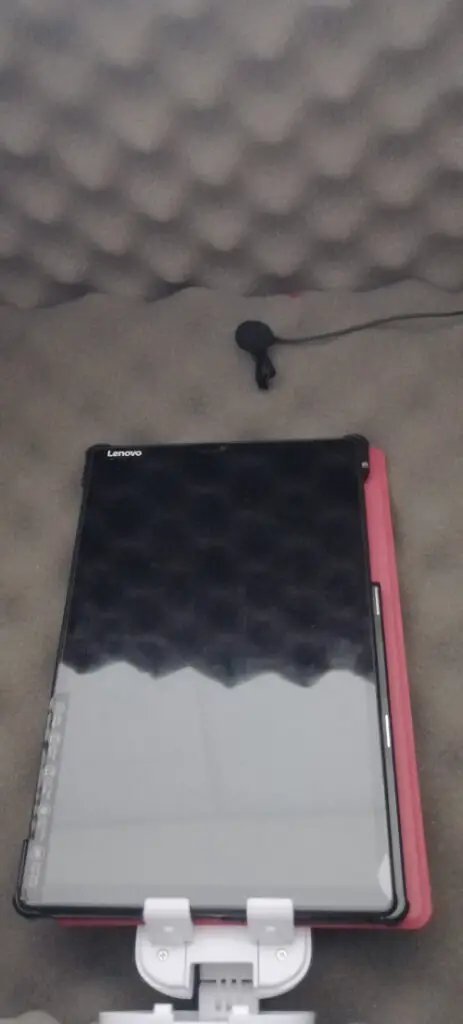
Just place your tablet on a stand and locate the microphone (in this picture you can see a lavalier Type C mic) at around 8 to 10 inches from your face.
Recording a Podcast with the Smartphone’s Built-In Mic
- Place your smartphone on a smartphone stand. This will help you set a convenient distance between your face and the built-in mic in your device, and also will allow you to operate your computer or tablet to read the script with ease.

- Your smartphone must be placed in a way that doesn’t pick up your breathing or exhaling.
- If you are recording two people at the same time, you may place the smartphone between them, so one voice will sound to the left and the other to the right (the stereo field I mentioned earlier in this post).
- If you have more than two participants or guests, and you want to get the best sound possible, try to use a smartphone for each person. All you have to do is clap two or three times once you have started recording on all of them, so you can see clearly the shape of the clapping in the audio wave, and then synchronize all these voice tracks quickly when you import them into your DAW (Audacity, Reaper, Cubasis, etc.).
- Once you have finished your recording, choose the share option on your favorite email app, to send each audio file to yourself or the person you will trust to mix and finish your recording. Then you download the audio files to the computer you will use to edit all the components of the episode (voices, sound FX, transitions, background music).
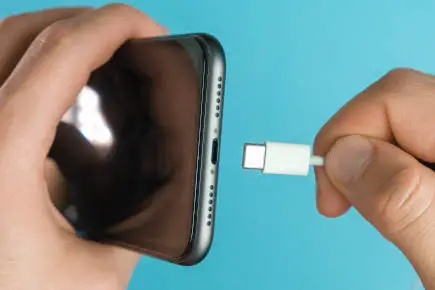
Recording a Podcast with a Type – C USB mic on your Smartphone, Tablet, or Computer
It’s very similar to recording your voice directly with the built-in mics, but with the advantage of reducing some of the noise.

AudioPro Plug and Play Type C USB Microphone

- Connect the Type C USB mic to your smartphone, tablet, or computer.
- Open the voice recording app and record just for a moment, to set how far or close you need to locate the mic. If you are using a lavalier mic, place it on the guest’s chest and keep an eye on the volume you are getting. Some brands need to be placed further than others.
- If you use a different app to record, like Cubasis (by Steinberg), you can set the levels exactly as you want, as it is designed to allow you to control that.
- With lavalier mics, you can place the smartphone on a flat surface at the distance you want. Keep in mind how long the cable is, so there won’t be any chances of someone pulling the cables by accident.
- If you use lavalier mics, some models allow you to record two mics on the same type C USB input on your device, but you need to remember that the two voices will be present in the same audio track.
How to Record a Podcast at Home
Before you start recording your podcast, read the following tips to get a successful recording:
- To record a podcast at home, choose a place and time of the day to avoid unwanted noises and interruptions that can affect your mood or inspiration (car traffic, dog barking, ambulance siren, children playing or crying, old air conditioner sound, household appliances, etc.).
- Many famous podcasts were created and are still being produced inside a closet, a studio office, or a basement with thick carpets and curtains. You can remove most of the reverb and unwanted sounds using noise removal plugins, which come with your DAW.
- The kinds of noises that are very difficult or impossible to remove are when the unwanted sound is in the same frequency range as the human voice (dog barking, TV program or film, background music)
- If you are in a situation where it is really difficult to avoid 100% unwanted noise, just make a sound with your tongue a couple of times, and then go back to the last things you said (last sentence, line, paragraph, etc.). In a few words: repeat what you (or your guests) had just said, so you can easily delete the unwanted sections and keep the good parts to complete the audio track.
With a little budget, you can get Waves Clarity VX to reduce or even remove all the noises in your recording, to make your podcast sound really good.
- Once you have chosen the place where you will record your podcast, make sure you have enough space on a table and a chair for each participant. Make sure there are no objects that can be pushed or hit during the recording.

- Place your script (on paper, on a tablet, computer, or smartphone) at a suitable distance so you can read with natural intonation, move your hands if you want, and be comfortable during the entire recording session.
Step 1: Connect your microphone to your device.
Step 2: Start talking to make a sound check and avoid placing the microphone too close to your mouth.
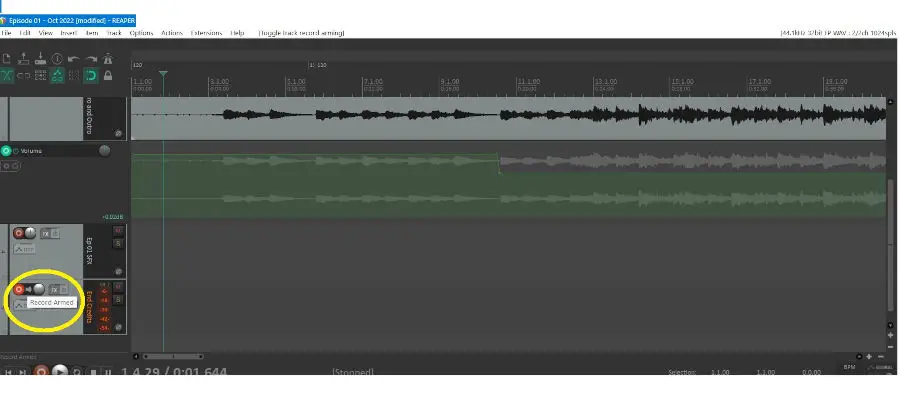
Step 3: If you’re working on a computer, make sure you activate the audio track(also called “arm”) where you will be recording each host or guest.
Step 4: Share the file (send it via email) to yourself so you can download it onto your computer and edit it on your favorite DAW (Audacity, Reaper, Cubase, etc.)
Step 5: If you recorded your voice tracks directly to your computer, using your favorite DAW, all you need to do is start editing them to remove unwanted sounds and insert music intro and outro, music transitions, or any other sound effect.
What Elements Does a Podcast Have
The elements that a podcast must have depend on the podcast format that you want to create. The most common podcast formats use a script, where the hosts or narrators apply an intonation that makes it sound natural, not plain and uninteresting, as an ordinary text. They tend to have a characteristic music intro and outro, music transitions, and sound effects.
My two favorite podcasting/broadcasting companies are Gimlet Media, BBC Drama, and BBC Radio 4. Gimlet Media was created by Alex Blomberg (Start Up), with great projects like Homecoming and The Habitat and so many more.
My other great love is Radio 4. I always stress that learning from critical listening is a very useful strategy.
I’ve enjoyed so many of their podcasts, that they became an excellent source for me to learn how to develop each type of podcast format, how long the intro music can be, where to insert the music transitions, credits from sponsors, how long an episode can be so the listener keeps hooked to the end and gets to know what the next episode will be about.
| Fiction / Non-Fiction Content | Topics | Main Elements |
| Non-Fiction A single host Two or more hosts Guest(s) for an interview | Personal narrative Narrative journalism Audio documentaries Blog post audio support Academic content | A chosen topic supported by a script Intro music Host(s) and/or guest(s) introduction and a brief summary of what the episode is about Music transitions, sound effects Quick preview of the next episode End credits (editing, sound design, music, production) |
| Fiction content Narrator(s) Voice actor(s) | Audio plays Storytelling Poetry | Script Intro music (soundtrack) Narrator or voice actor presenting the title of the work, info about the author, and him/herself Music transitions, sound effects End credits (editing, sound design, music, production) |
What Is the Basic Structure of a Podcast
The basic structure of a podcast always includes the introductory part, the middle point of the topic or story (where the listener still doesn’t know how things are going to end up), and the ending, concluding part, climax, or solution to the proposed initial question, issue, or topic.
Take a look at the most popular structures of podcast formats: https://www.buzzsprout.com/blog/podcast-structure
My honest recommendation to you is to start your podcast without being afraid of making mistakes. It’s essential to learn from the things that cause us some level of frustration because they are the ones that keep us focused on working and refining them in the next episodes.
Check my recommended audio interfaces and digital recorders, headphones and studio monitors, and the best microphones for your podcast projects.